Valentine’s Day Felt Envelopes (Free Tutorial!)

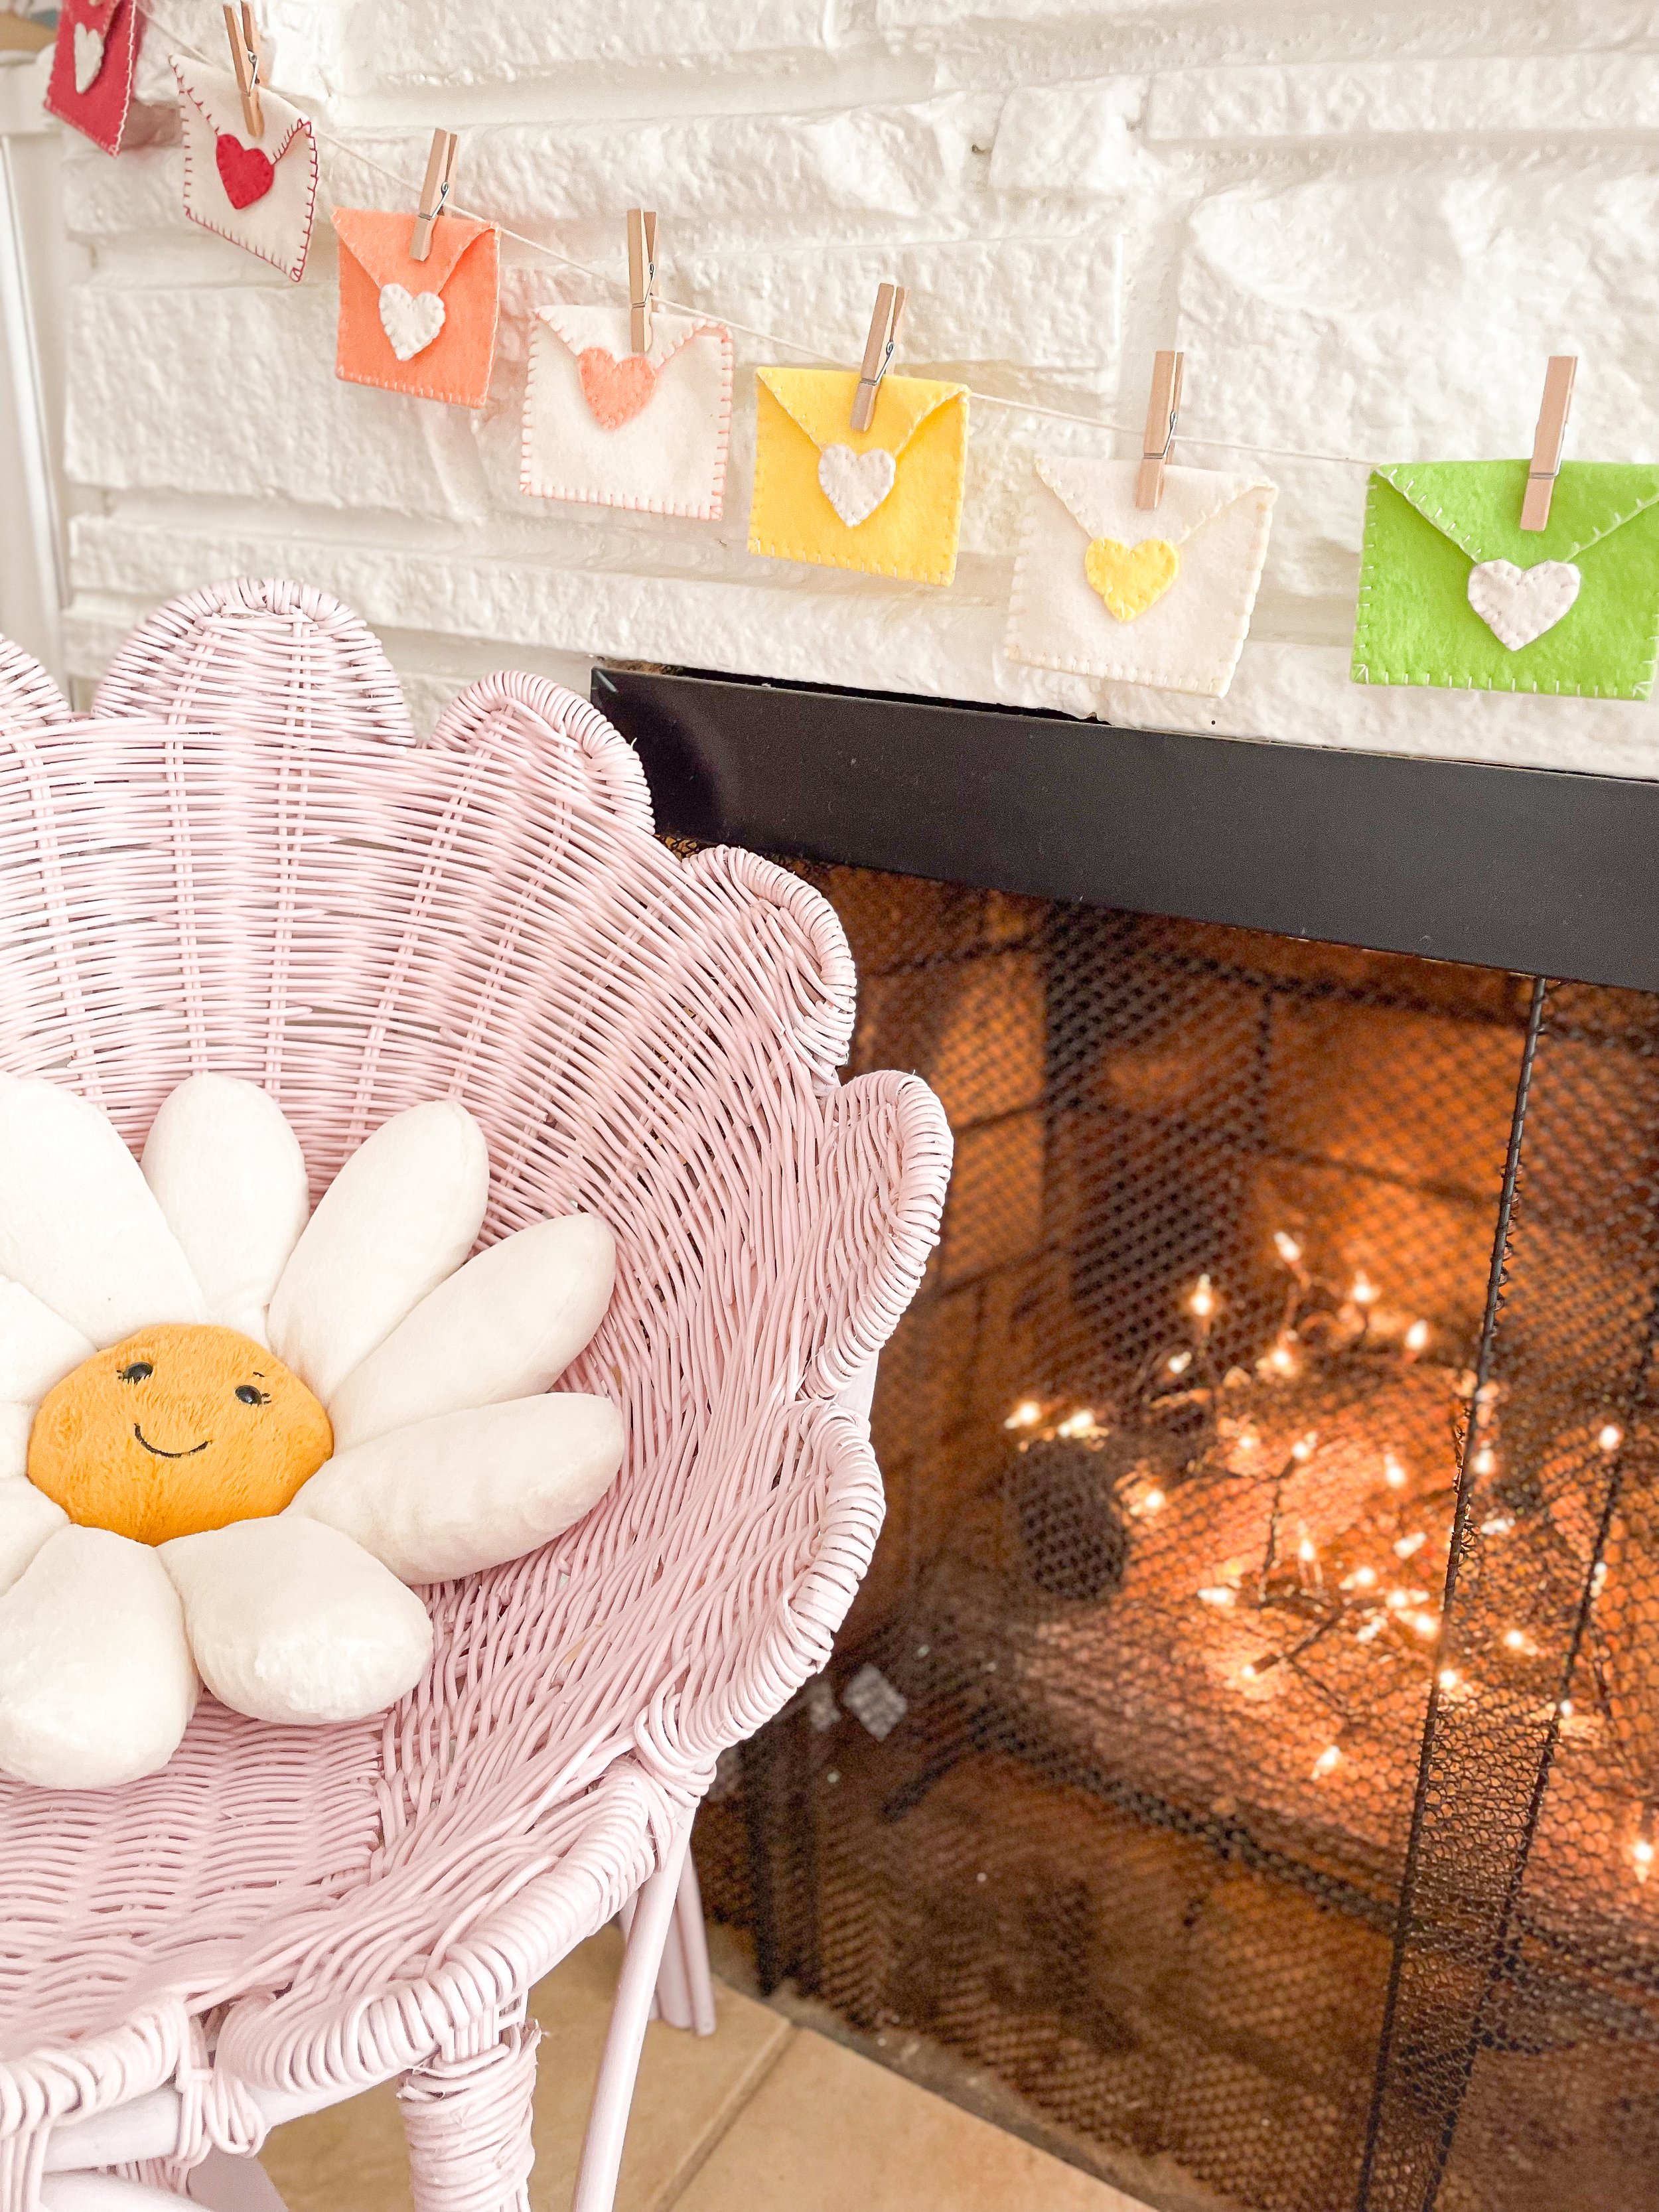
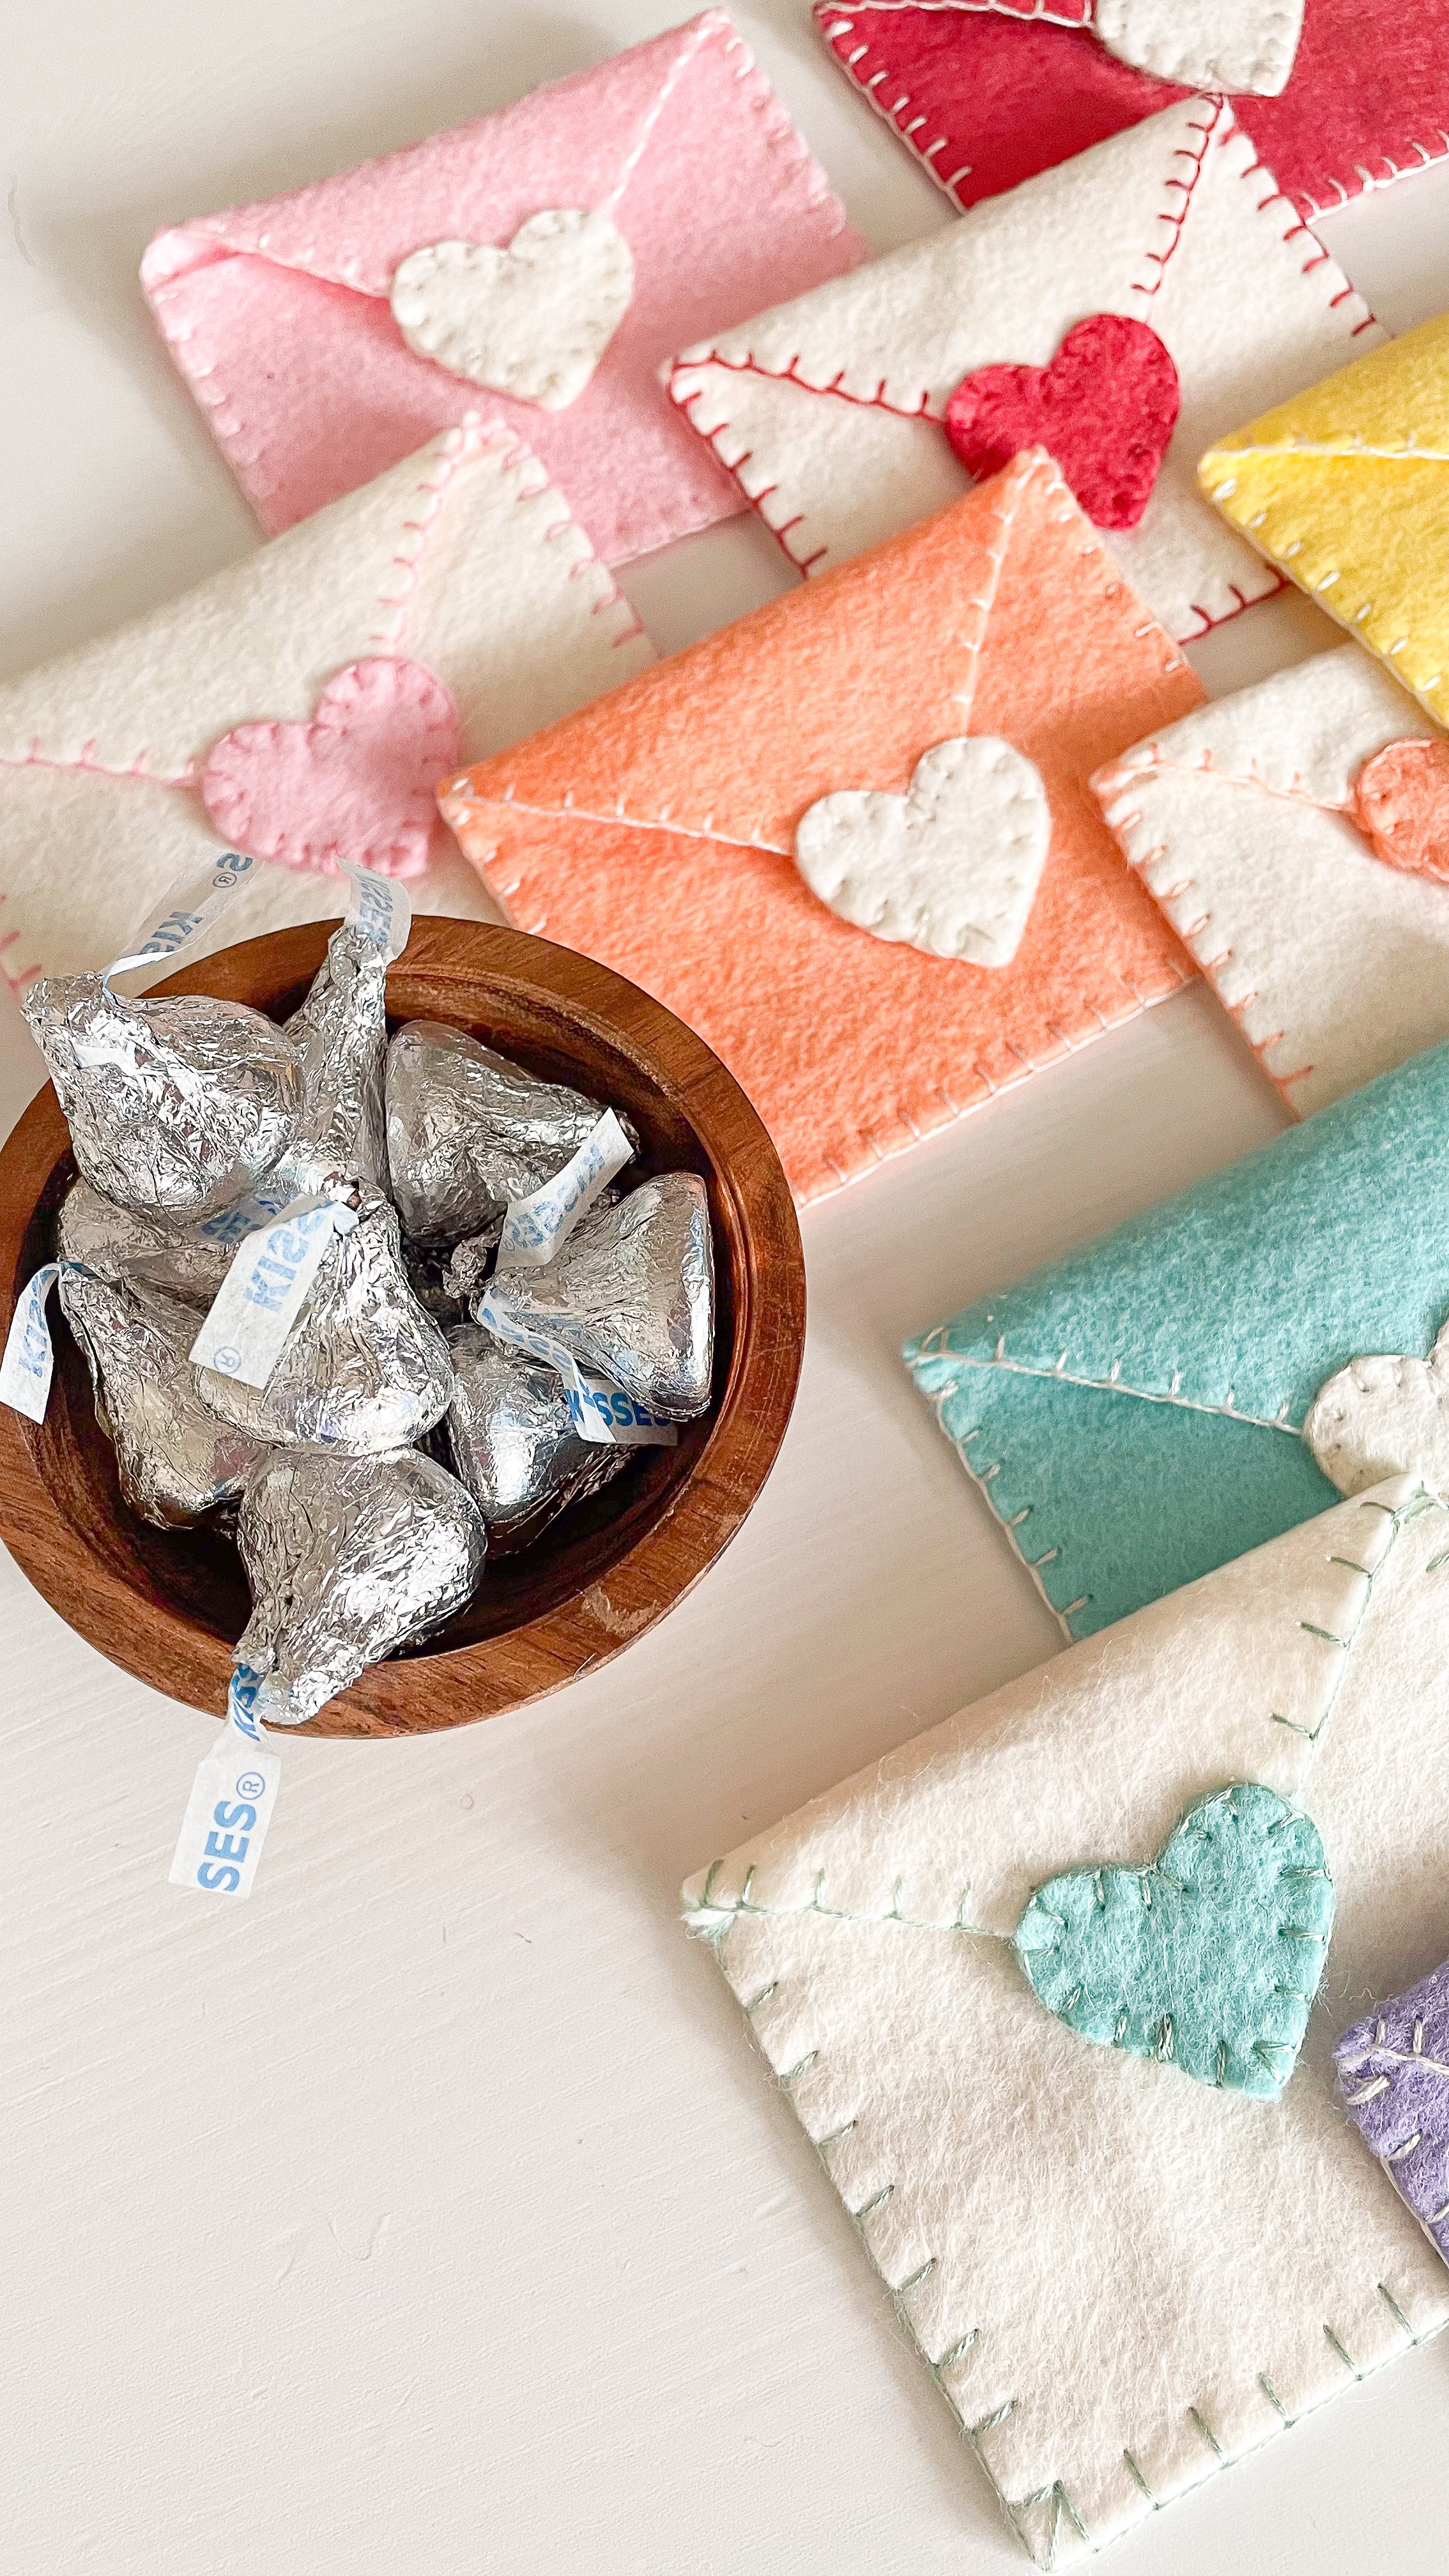
These sweet Valentines are quick to sew and add a festive sprinkle to the fireplace! I used twine and clothespins to create a garland, placed small treats inside each envelope, and voilà – now we have a colorful countdown calendar to Valentine’s Day. These handmade felt envelopes are small and versatile, and can be gifted to friends or used for imaginary mailbox/post office play for little ones. This beginner’s tutorial is a great introduction to embroidery and hand sewing – enjoy!
Tools & Supplies
Felt & Floss: Benzie Design
I recommend using Wool Blend Felt or Pure Wool Felt (as opposed to craft felt) for fiber thickness, quality, and resistance to pilling/tearing/stretching. A 6x9” sheet of felt is needed for every color except for Linen, which requires a 12”x18” sheet. DMC Embroidery Floss is recommended for quality and sewing ease. Find the following colors, tools, and more from BenzieDesign.com.
Pink (DMC #963)
Strawberry (DMC #347)
Guava (DMC #3824)
Linen (DMC #3866)
Butter (DMC #3078)
Chartreuse (DMC #907)
Aqua (DMC #3811)
Thistle (DMC #211)
Tools
Cut Template PDF (download below)
Iron
Freezer Paper (optional, for pattern transfer)
Fabric Scissors
Needle
Aleene’s Fabric Fusion or other Fabric Glue (optional, for neatly placing floss ends).
Twine/String and Mini Clothespins for creating finished garland.
Sweet treats like Hershey’s Kisses, Rolos, or Conversation Hearts!

Free Tutorial
Valentine’s Day Felt Envelope Garland

Cut + Press
Trace or print the Cut Template PDF to the dull side of your freezer paper.
With the shiny side face-down, iron the template to the felt with low heat.
Cut out the felt pieces, then peel off the freezer paper.
Press felt envelopes along the dotted lines.
Sew
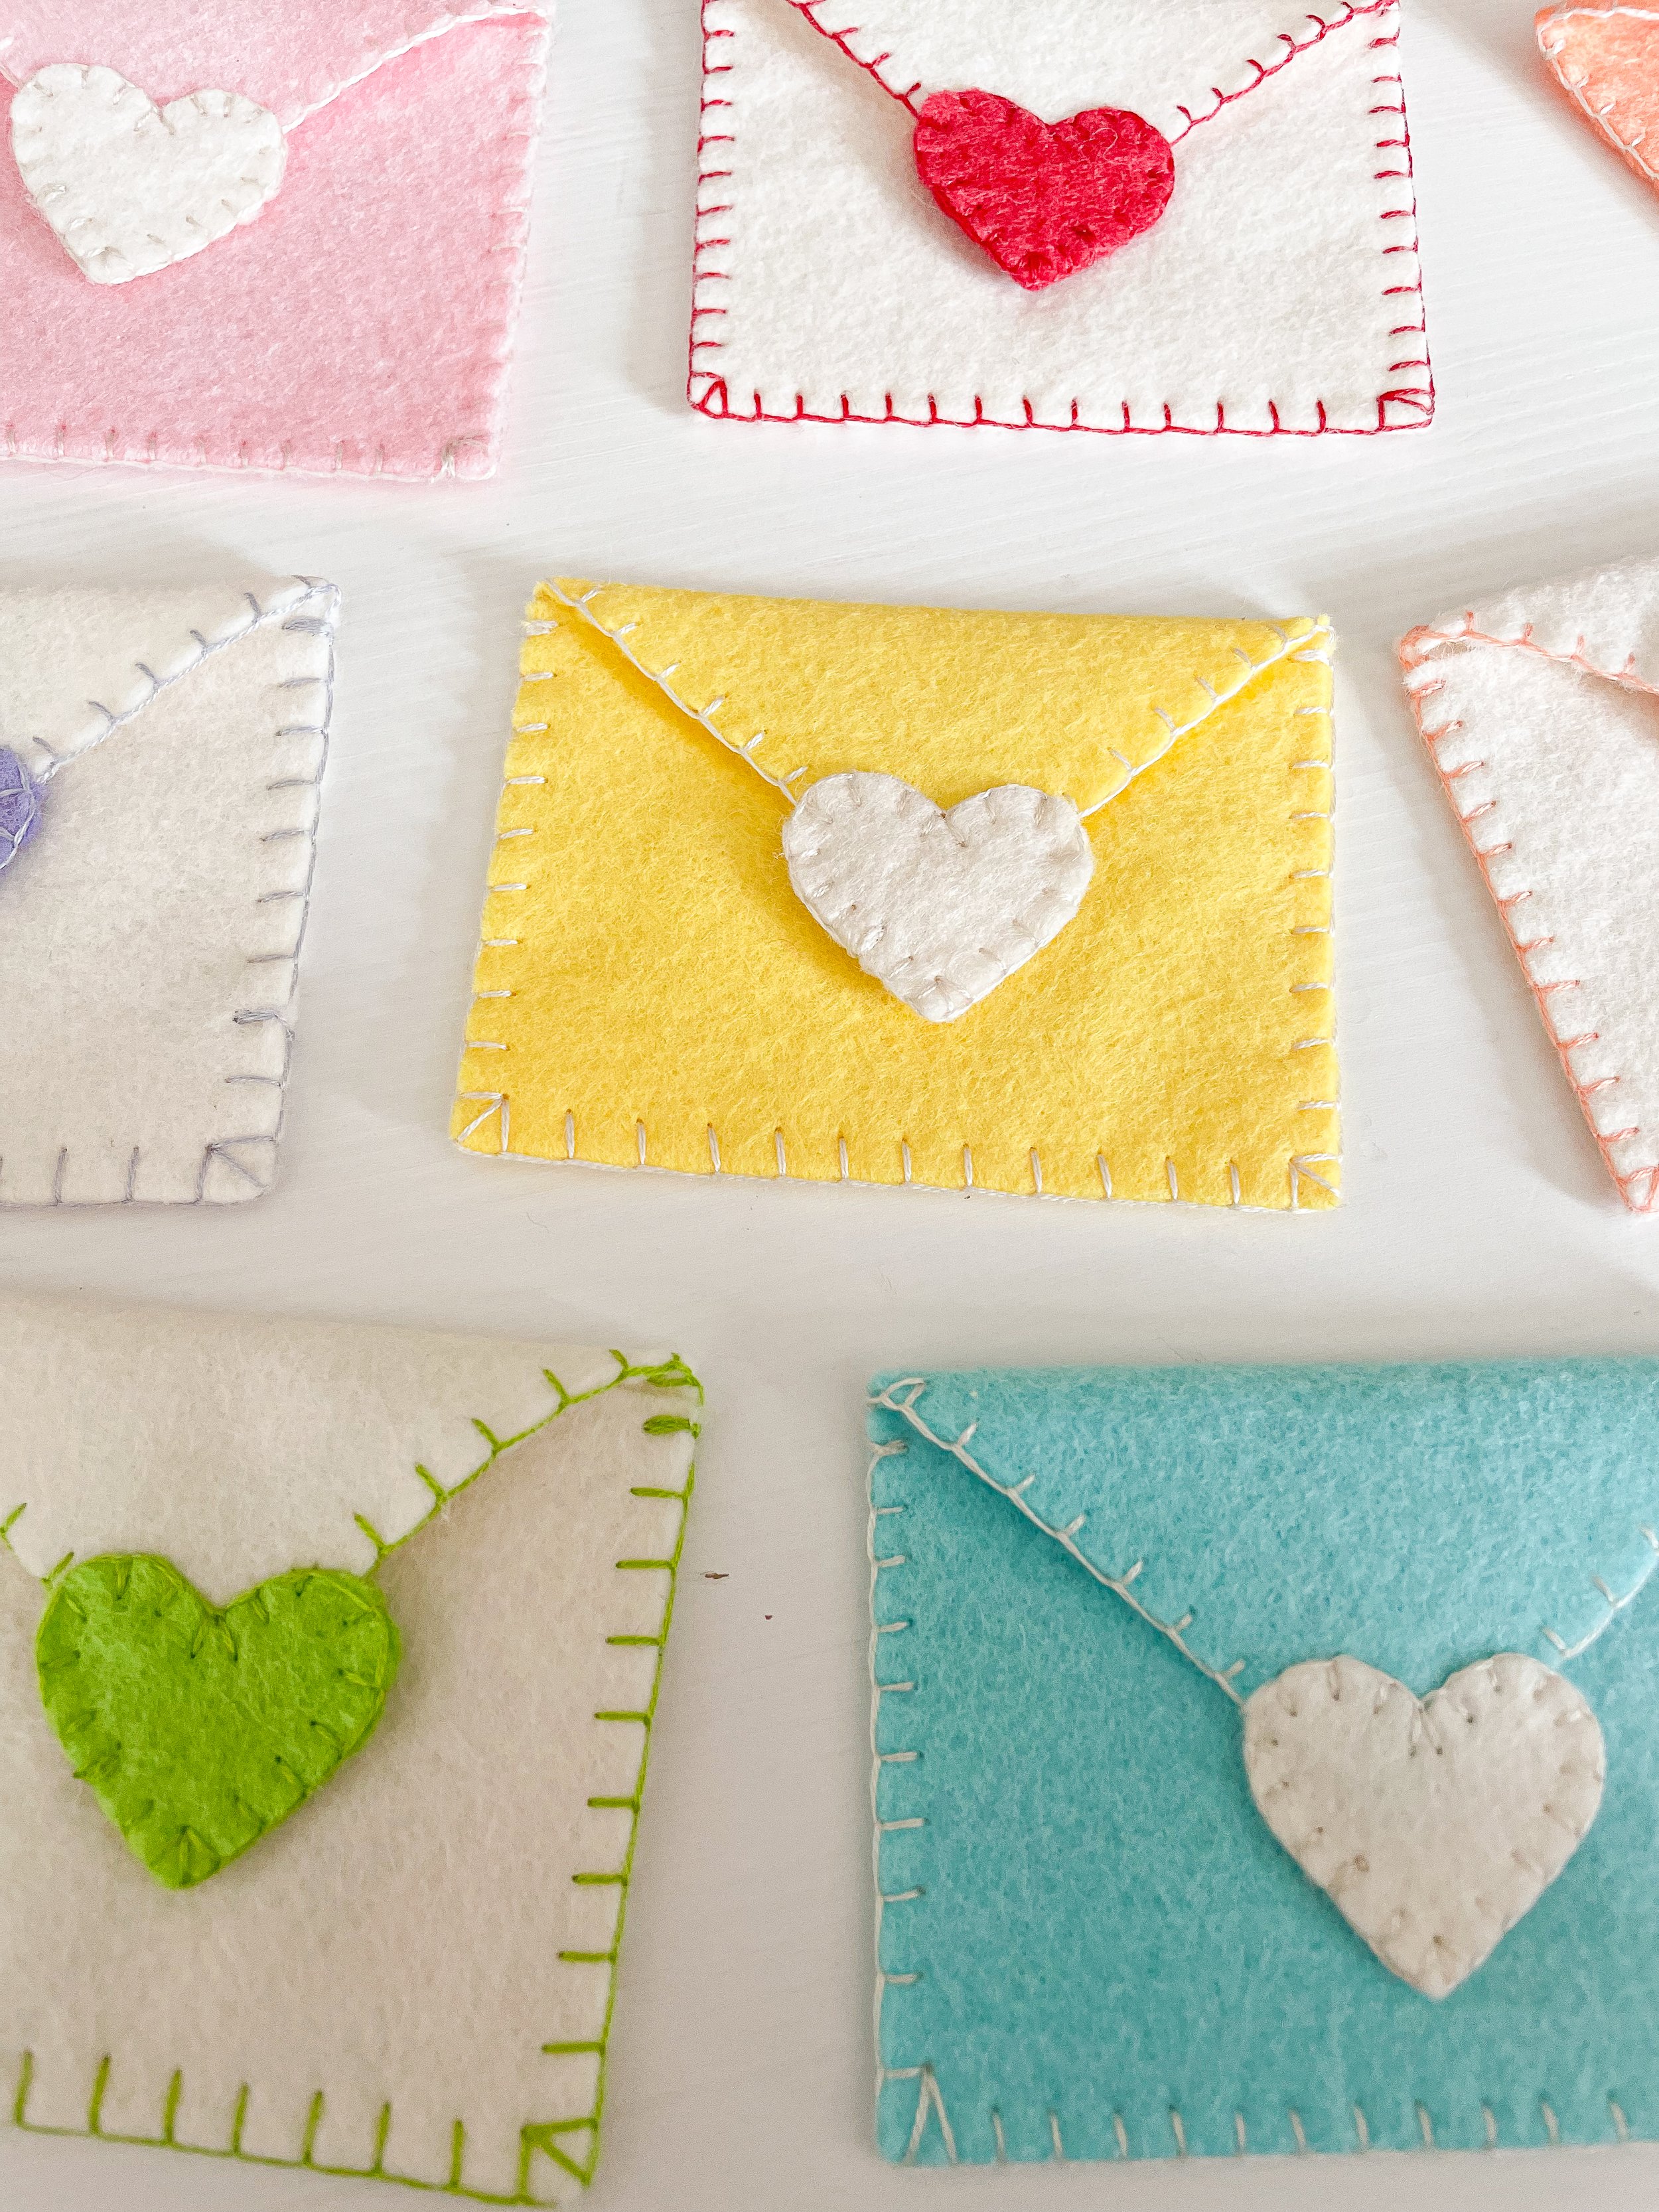
Prep: Use two strands of floss to sew (and save the remaining four strands for later). The floss color should coordinate with each heart, in order for the stitching to create contrast against each envelope.
Envelopes: Beginning at the pointed top of the envelope flap, use blanket stitch to sew along the outside edges of the envelope and tie off. (Not sure how to blanket stitch? I love referencing this quick tutorial by Molly and Mama.)
Hearts: Sew a few blanket stitches along the point in order to secure the two hearts together, then sandwich the envelope point between the hearts and continue stitching around the heart. After creating a knot and trimming the floss, I like to use a small amount of Aleene’s Fabric Fusion to keep the ends neatly placed.


Finishing Touches
Add treats, clothespins, and twine to string your garland along your fireplace or other special spot.
Happy Valentine’s Day!
If you had fun making this tutorial, please send me a pic or share on Instagram by tagging @moseycreative. Thank you for showing me your creations, because it motivates me to keep coming up with new ideas!