
Magical Block Play: DIY Felt Castle Sleeves
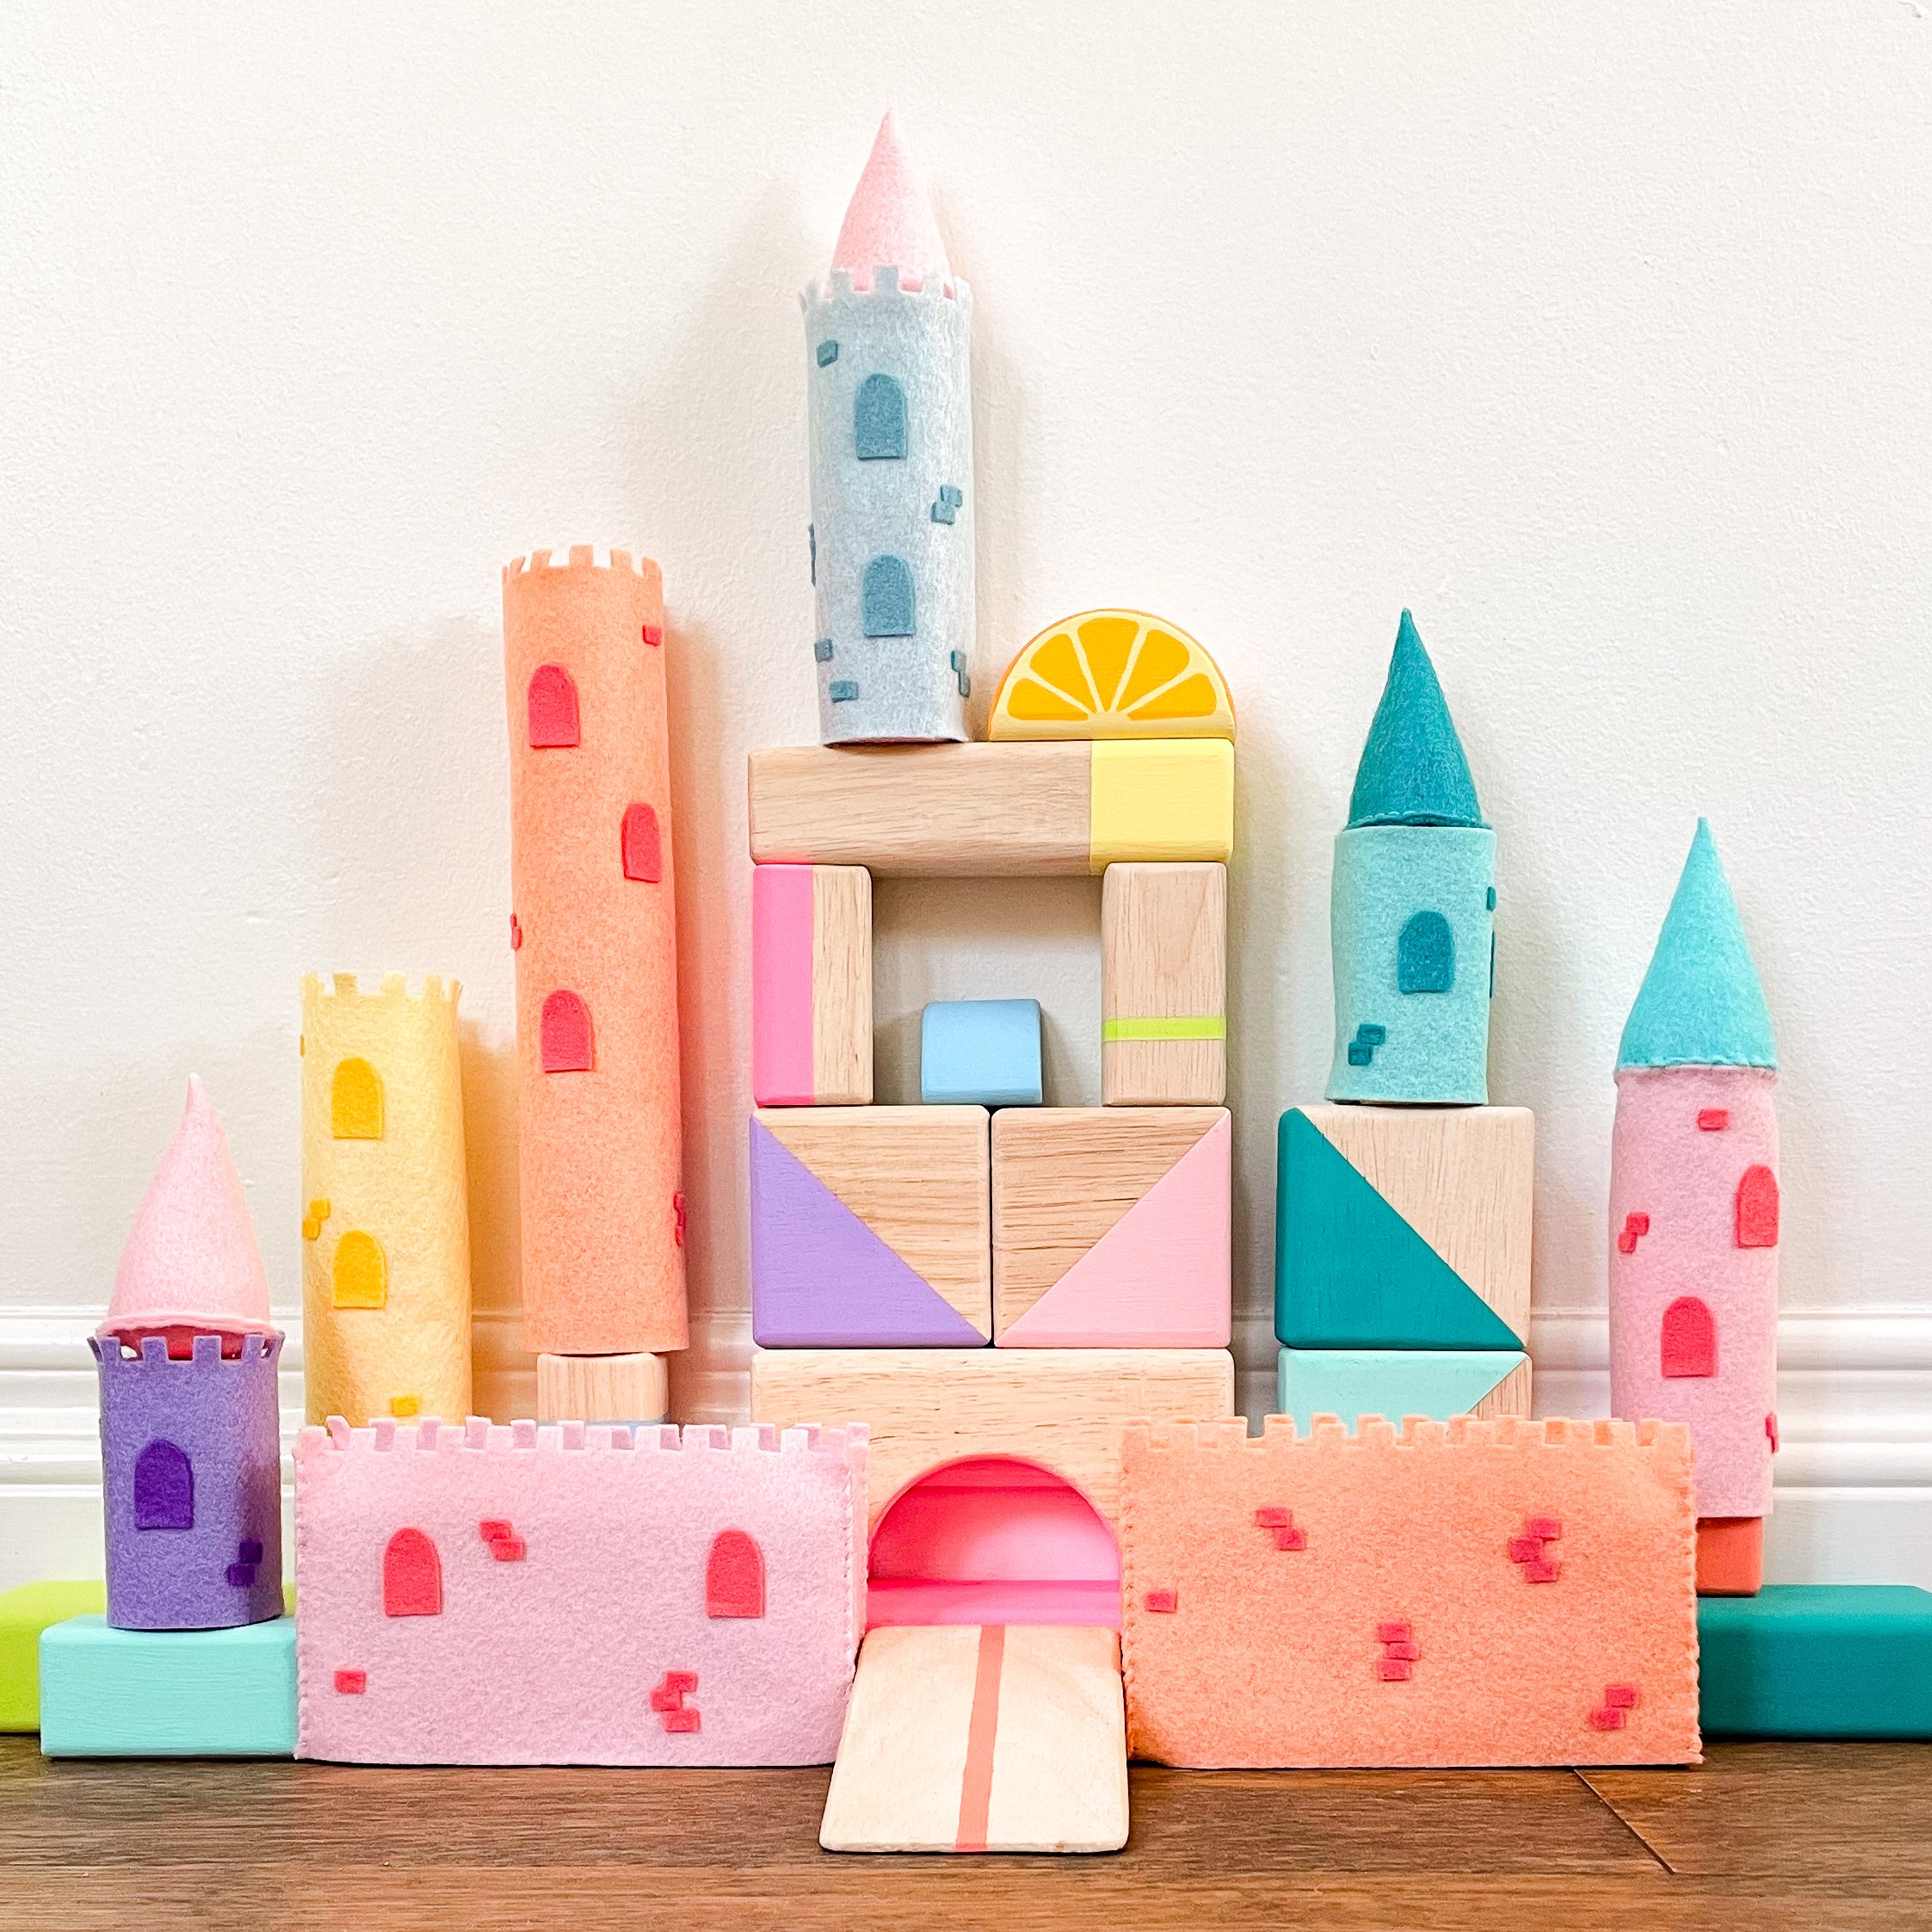
Let’s give imaginative play a felty upgrade with these handmade castle sleeves! Designed to slip right over the painted wooden blocks from my previous tutorial, they turn simple shapes into castles, towers, and little scenes waiting to unfold. You don’t need much — just some wool felt, a few stitches, and your favorite color palette. In this tutorial, I’ll share templates, tips, and inspiration to help bring your block castles to life.
Materials
All supplies available at Benzie Design, unless noted otherwise.
Wool-Blend or Pure Wool Felt
Combinations I used include Pink + Coral, Guava + Coral, Butter + Dandelion, Mint + Chartreuse, Icicle + Salt Water, Aqua + Peacock, and Opal + Lavender.
Coordinating Sulky Thread
Fabric Scissors
Freezer Paper
Iron
Turbo Tacky Glue
Polyfil Stuffing
Fabric Stiffener
Wooden Blocks: Melissa + Doug Classic Wooden Blocks (60 Pieces)

Directions
1. Cut Felt
Print or trace Cut Template onto dull side of freezer paper, then iron shiny side to your felt. Cut out all pieces.
Note: The template is sized for Melissa + Doug Classic Wooden Blocks. If you’re using a different block set, just resize the felt pieces accordingly.
2. Add Windows + Bricks
Use Turbo Tacky Glue to attach bricks and windows wherever you’d like on your towers and walls. Let dry under a heavy book for a flat, secure finish. Feel free to get creative with extra appliqué or embroidery details!
3. Add Fabric Stiffener (Optional)
To keep the battlements looking crisp, spray both sides of the pieces with fabric stiffener while they’re laid flat in a cardboard box. Let dry for about an hour, then press with a cloth to set.
4. Sew Seams
Whipstitch or backstitch the seams with coordinating Sulky Thread or two strands DMC Embroidery Floss. For towers, overlap and pin the sides together so that the battlements (square openings at the top) line up, thus creating approximately ¼” seam allowance. Tie off and conceal thread ends on the inside. For tower roofs, stuff with polyfil as you sew. I attached some roofs to their towers and left others loose — like little felt hats you can swap and rearrange. Mix, match, and make it your own!
Ready to Play!
I hope your finished spires add some extra magic to your block set – now it’s time to build a storybook scene and let big little imaginations take it from there! These felt castle sleeves are the perfect companion to my painted wooden blocks tutorial. They’re colorful, endlessly mix-and-matchable, and a sweet way to encourage open-ended play. If you make your own, I’d love to see — feel free to share or tag me on Instagram @moseycreative.

Make your own customized blocks with my DIY Painted Blocks Tutorial!